The Best Fluffy Pancakes recipe you will fall in love with. Full of tips and tricks to help you make the best pancakes.

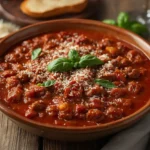
Manicotti with meat recipe brings authentic Italian comfort food right to your family table. This hearty dish features tender pasta tubes filled with a rich mixture of seasoned ground meat, creamy ricotta, and Italian herbs, all baked in a blanket of zesty marinara sauce until perfectly bubbly.
While restaurant-style manicotti can sometimes feel heavy, this homemade version strikes the perfect balance between indulgent and light, using quality ingredients and time-tested techniques for the best results. The key is in the proper filling technique and careful baking time to achieve that coveted golden-brown top while keeping the pasta tender.
Prep Time: 45 minutes
Cook Time: 35-40 minutes
Total Time: 1 hour 25 minutes
Yield: 6-8 servings
Contents
hide
Ingredients

- 12-14 manicotti shells
- 1 pound ground beef (80/20 lean)
- 1 pound whole milk ricotta cheese
- 2 large eggs
- 2 cups shredded mozzarella, divided
- 1/2 cup grated Parmesan cheese
- 3 cloves garlic, minced
- 1/4 cup fresh parsley, chopped
- 2 teaspoons dried Italian seasoning
- 24 ounces marinara sauce
- 1 small onion, finely diced
- Salt and black pepper to taste
For the best results, choose high-quality whole milk ricotta – avoid the part-skim varieties as they can become grainy when baked. Fresh mozzarella can be substituted for pre-shredded, but be sure to drain it well to prevent excess moisture.
When selecting ground beef, the 80/20 lean-to-fat ratio provides the ideal balance of flavor and texture. If preferred, you can substitute with ground turkey or Italian sausage for a different flavor profile.
The marinara sauce should be relatively thick – if using homemade sauce, simmer it down until it reaches a consistency similar to commercial pasta sauce. This prevents the final dish from becoming watery.
Manicotti with Meat Recipe: Step-by-Step Instructions

Following these detailed steps will ensure your meat-filled manicotti turns out perfectly every time. Pay special attention to the pasta cooking time, as overcooked shells can tear easily during filling.
- Preheat your oven to 375°F (190°C) and bring a large pot of salted water to boil.
- Cook manicotti shells for 2 minutes less than package directions, drain, and lay separately on a clean kitchen towel.
- Brown ground beef with diced onion in a Large Skillet, breaking meat into small crumbles.
- Drain excess fat and mix meat with ricotta, half the mozzarella, Parmesan, eggs, garlic, and seasonings.
- Spread 1 cup of marinara sauce in the bottom of a 9×13 baking dish.
- Transfer the meat mixture to a Piping Bag Or Zip-top Bag with corner snipped.
- Carefully pipe the filling into each manicotti shell, working from both ends.
- Arrange filled shells in the prepared baking dish.
- Pour remaining sauce over the manicotti, ensuring all pasta is covered.
- Top with remaining mozzarella cheese.
- Cover with foil and bake for 25 minutes, then uncover and bake 10-15 minutes more.
(You can find out more via manicotti with meat recipe).
Watch for the cheese to become golden brown and bubbly – this indicates the perfect level of doneness. If the top browns too quickly, tent with foil to prevent burning while the inside finishes cooking.
Let the dish rest for 10-15 minutes before serving. This crucial step allows the filling to set and makes it easier to portion without the filling spilling out.
(You can find out more via manicotti with meat recipe).
Tips for Perfect Results
- Slightly undercook the pasta shells to prevent them from becoming mushy
- Use room temperature ricotta for easier mixing and filling
- Don’t overfill the shells – leave room for the filling to expand
- Cool the meat completely before mixing with cheese to prevent curdling
- Score the bottom of each shell lightly to help them stay in place
- Keep extra marinara sauce warm for serving
- Test shell doneness by piercing with a fork – it should meet slight resistance
- Remove foil during the last 10-15 minutes for perfect browning
- Let the dish rest before cutting to maintain shape
- Use a serrated knife for clean portions
A common mistake is rushing the filling process, which can lead to torn shells. Take your time and handle the pasta gently. If a shell tears, don’t worry – you can place it torn-side down in the baking dish.
Serving Suggestions
This hearty manicotti pairs beautifully with a crisp Caesar salad or simple mixed greens dressed with olive oil and balsamic vinegar. The fresh, light salad provides a perfect contrast to the rich, cheesy pasta.
Garlic bread or crusty Italian bread makes an excellent accompaniment, perfect for soaking up the extra sauce. For a lighter option, consider serving with roasted vegetables like broccoli or zucchini.
A glass of medium-bodied red wine, such as Chianti or Sangiovese, complements the robust flavors of the meat and cheese filling. For non-alcoholic options, sparkling water with a twist of lemon provides a refreshing contrast.
Storage & Reheating
Leftover manicotti can be stored in an airtight container in the refrigerator for up to 3 days. For best results, let it cool completely before storing to prevent condensation from making the top soggy.
To freeze, cover the assembled but unbaked manicotti tightly with plastic wrap and foil. It will keep in the freezer for up to 3 months. Thaw overnight in the refrigerator before baking.
When reheating individual portions, add a splash of marinara sauce and cover with foil. Heat in a 350°F oven for 15-20 minutes, or until heated through. Microwave reheating is possible but may result in slightly softer texture.
Variations
Classic Beef and Cheese Manicotti
For a traditional approach, use a mixture of ground beef and Italian sausage in the filling. This combination provides extra depth of flavor and a slightly spicier profile that many prefer in their pasta dishes.
How to Make Manicotti with Ground Turkey
Substitute ground turkey for a lighter version. Add extra garlic and herbs to compensate for the milder meat flavor. This variation pairs especially well with a spinach-ricotta mixture mixed into the filling.
Meat Stuffed Manicotti with Alfredo
Replace the marinara sauce with creamy Alfredo sauce for an indulgent twist. This variation works particularly well with a mixture of ground chicken or veal in the filling.
Manicotti with Meat Sauce Supreme
Enhance the sauce by adding Italian sausage, mushrooms, and bell peppers to create a heartier meat sauce. This creates an extra layer of flavor that complements the filled pasta beautifully. (Read also: Best Italian Recipes to Try at Home)
FAQ
Can I make manicotti ahead of time?
Yes, you can assemble the dish up to 24 hours in advance and refrigerate until ready to bake. Add an extra 10-15 minutes to the baking time if cooking from cold.
Why is my manicotti watery?
Excess liquid usually comes from watery ricotta or sauce. Drain the ricotta in a fine-mesh strainer for 30 minutes before using, and ensure your sauce is properly thickened.
Can I use no-boil manicotti shells?
Yes, no-boil shells can be used, but ensure there’s enough sauce to cover them completely, as they need the moisture to cook properly during baking.
How do I prevent the shells from splitting?
Slightly undercook the shells and handle them gently. If using a piping bag, don’t apply too much pressure when filling, and work from both ends of the shell.
What’s the best way to fill manicotti shells?
A piping bag or zip-top bag with the corner snipped off provides the most control and cleanest filling method. Work from both ends to ensure even filling.
Can I use different cheeses?
Yes, you can experiment with different cheese combinations, but always include ricotta as the base for proper texture. Fontina, provolone, or asiago make good alternatives to mozzarella.
Why did my filling become grainy?
Grainy filling usually results from using low-fat ricotta or mixing the filling with hot meat. Use whole milk ricotta and let the meat cool completely before combining.
How do I know when manicotti is done?
The dish is done when the cheese is golden brown, the sauce is bubbling around the edges, and a knife inserted into the center meets just slight resistance from the pasta.
Kitchen Tools You’ll Need
- 13×9 Inch Baking Dish
- Large Pot For Boiling Pasta
- Colander
- Large Mixing Bowl
- Piping Bag Or Zip-top Bag
- Large Skillet
- Measuring Cups And Spoons
- Wooden Spoon
- Aluminum Foil
More Recipes You May Like
 2")


The Ultimate Marinades & Rubs Guide
To receive the book for free, please send the following information via email.
Newsletter Frequency