The Best Fluffy Pancakes recipe you will fall in love with. Full of tips and tricks to help you make the best pancakes.

Recipes for canning venison meat offer an excellent way to preserve your harvest and enjoy the rich flavors of deer meat throughout the year. Whether you’re an experienced hunter or received venison from one, proper canning ensures safe, delicious results that can last up to 5 years when stored correctly.
This comprehensive guide will walk you through the essential steps of pressure canning venison, along with expert tips to achieve the best results. With proper technique and attention to safety, you’ll create shelf-stable jars of tender, flavorful meat perfect for quick meals.
Prep Time: 2 hours
Cook Time: 75-90 minutes (processing time)
Total Time: 3-4 hours
Yield: 7-8 quart jars
Calories: 245 per cup
Contents
hide
Ingredients

- 5 pounds fresh venison meat, trimmed
- 2 teaspoons salt per quart jar
- 1 teaspoon black pepper per quart jar
- 1 small onion per jar (optional)
- 1 garlic clove per jar (optional)
- 2 bay leaves per jar
- 1 tablespoon vinegar per jar
- Boiling water or broth
- Canning salt
- Fresh lemon juice (optional)
Select high-quality, fresh venison that has been properly field dressed and chilled. The meat should be free from excessive fat, silver skin, and any bruised areas.
For best results, use meat that has been aged for 7-10 days at 34-37°F. This improves tenderness and flavor development.
When choosing seasonings, stick to tested recipes. Avoid adding butter, oil, or thickeners, as these can interfere with safe heat penetration.
Recipes for Canning Venison Meat: Step-by-Step Instructions

Follow these steps carefully to ensure safe preservation of your venison.
- Clean and sterilize all canning jars, lids, and equipment in hot soapy water
- Cut venison into 1-inch cubes, removing all fat, gristle, and silver skin
- Pack raw meat loosely into hot quart jars, leaving 1-inch headspace
- Add salt, seasonings, and vinegar to each jar
- Pour boiling water or broth over meat, maintaining 1-inch headspace
- Remove air bubbles using a plastic utensil
- Wipe jar rims clean and adjust two-piece lids
- Load jars into preheated Pressure Canner with 2-3 inches water
- Process at 10 pounds pressure (adjust for altitude)
- Allow pressure to drop naturally before opening canner
- Cool jars undisturbed for 12-24 hours
(You can find out more via recipes for canning venison meat).
Processing time is critical: 75 minutes for pints, 90 minutes for quarts at sea level. Increase pressure for higher altitudes according to your canner’s manual.
Tips for Perfect Results
- Always use a proper pressure canner, never a water bath canner
- Remove air bubbles thoroughly to prevent false seals
- Keep meat and jars hot throughout the packing process
- Don’t overfill jars – meat will expand during processing
- Check seals after cooling – lids should be concave
- Store in a cool, dark place below 70°F
- Label jars with contents and date
- Use within 2-5 years for best quality
- Discard any jars with broken seals
- Always boil canned meat for 10 minutes before tasting
How to Can Deer Meat Safely
Safety is paramount when canning venison. Monitor your pressure gauge carefully and maintain steady pressure throughout processing. Any fluctuations can compromise safety.
Serving Suggestions
Canned venison is incredibly versatile. Use it in stews, soups, casseroles, or any recipe calling for beef. The meat will be tender and ready to use straight from the jar.
For quick meals, heat and serve over rice or noodles with the canning liquid. The broth is full of flavor and makes an excellent gravy base.
(You can find out more via recipes for canning venison meat).
Try adding canned venison to shepherd’s pie, tacos, or pulled sandwiches. The tender texture works perfectly in these applications.
Storage & Reheating
Store sealed jars in a cool, dark place between 50-70°F. Check seals monthly and use any compromised jars immediately.
Once opened, refrigerate and use within 3-4 days. Never taste meat from jars with broken seals or that appear spoiled.
To reheat, bring meat and liquid to a full boil for at least 10 minutes. This ensures any potential bacteria are destroyed.
Variations
Pressure Canning Venison with Vegetables
Add carrots, potatoes, and celery to create a ready-to-eat stew base. Remember that vegetables will soften considerably during processing.
Canning Ground Venison for Quick Meals
Process ground venison in the same way, but avoid adding fat. The meat will be crumbly and perfect for tacos or meat sauce.
Traditional Hunters’ Style Preserved Venison
Season with bay leaves, juniper berries, and black peppercorns for a traditional flavor profile beloved by hunters.
Spicy Southwest Canned Deer
Add dried chilies and cumin to each jar for Mexican-inspired meals. Remember to stick to tested quantities of dry seasonings. (Read also: How to Pressure Can Venison for Long-Term Storage)
FAQ
Can I use a water bath canner for venison?
No, venison must be pressure canned for safety. Water bath canning cannot reach temperatures high enough to eliminate botulism risk in meat.
Why did my jars lose liquid during processing?
Rapid pressure changes or fluctuating heat can cause liquid loss. Maintain steady pressure and let canner depressurize naturally.
How long will canned venison last?
Properly processed and stored venison remains safe for 2-5 years, though quality is best within 2 years.
Should I add fat when canning venison?
No, avoid adding fat as it can interfere with proper heat penetration and may go rancid during storage.
Can I reuse canning lids?
Never reuse canning lids – the sealing compound is designed for single use only. Always use new lids for each batch.
What causes jars not to seal?
Food particles on jar rims, damaged lids, or improper processing can prevent proper sealing. Clean rims thoroughly and use undamaged supplies.
Is it normal for the meat to shrink?
Yes, venison will shrink during processing. This is why proper headspace is crucial when filling jars.
Can I add wine or marinades?
Stick to tested recipes. Additional acidic ingredients can affect processing time and safety.
Kitchen Tools You’ll Need
- Pressure Canner
- Canning Jars And New Lids
- Jar Lifter
- Bubble Remover Tool
- Sharp Knife
- Cutting Board
- Large Stockpot
- Measuring Spoons
- Funnel
- Clean Kitchen Towels
Extra Reward
🎁 Beyond The Tools: A Gift For You!
I hope you found the kitchen tools recommended above helpful! As a thank you for reading, I’ve unlocked a few exclusive Free Amazon rewards just for my followers.
Includes: Free Audiobooks • Kitchen Discounts • Welcome Boxes
More Recipes You May Like
 2")


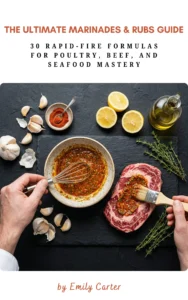
The Ultimate Marinades & Rubs Guide
To receive the book for free, please send the following information via email.
Newsletter Frequency